
Setting up build servers, slack notifications and automatic Steam deployments
Just went through the job of setting up the build system for our game and it was so fun, I thought I’d document the process for anyone else that might be going through the process.
First, why do we need to create a Build server?
For small teams, often builds are created simply by hitting ‘build’ in Unity – without much other consideration for the process. This works fine at first, however eventually you want to start sharing builds with other people and in general testing that everything is working on a ‘continuous’ manner, instead of whenever you remember you make a build.
A common issue that you can run into being a small indie is simply going heads down, working on features for days or weeks on end. This is one of tools like Unity (or Unreal)’s strengths – being able to test and iterate directly in the Editor.
However, this is very dangerous – you can often go a long time without realizing that your game literally doesn’t work – the Editor can (and will) LIE to you about many things that are only apparent once you make a build.
Finally, if you are working on a multiplayer game (like Dystopia Punk), You really can’t test the game properly without making a build.
How do we set this up?
When it comes to building games, there are a few common options:
Unity Dev Ops (used to be called Cloud Build, but they’ve bundled Cloud build, plastic and other nonsense into the useless name Dev Ops, which is ridiculous and I could rant about it for a whole other post)
Jenkins
Teamcity
Jenkins is often considered the de facto option that many people use, but…I really dislike it, and honestly 99% of my dislike is just the UI is horrendous. It’s perfectly functional and many of the steps are the same, but…I’m going to be using TeamCity for my build system.
What I’m looking to do
For my build system to be considered ‘complete’, I want it to:
Sync the latest changes of my project down to the build agent. I’m using Perforce (hosted by Assembla) to host my project(s).
Build the Unity project. I’ll be using a custom build script to actually do the build (which I’ll share below).
Copy the build output to the Steampipe SDK Content folder (where steam automatically picks up the files for upload)
Run the steampipe build commands, automatically make the build live on an internal build channel / branch in Steam.
If the build succeeds, zip the output and make it available on TeamCity
Ping a slack notifcation pointing to the respective build on TeamCity!
Let’s go through the steps!
Download / Install TeamCity!
TeamCity is created by JetBrains, developers of the awesome Rider IDE (if you aren’t using Rider for your Unity dev, you’re missing out, seriously).
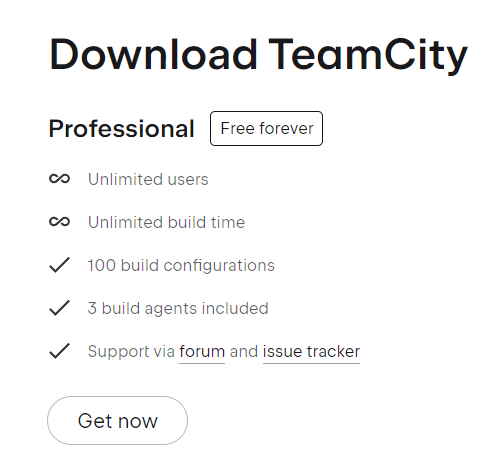
They have a ‘pro’ license that supports up to 3 build agents and 100 configurations, which works perfect for me since…I’m literally building the projects on my personal workstation and even with multiple games, won’t get anywhere near 100 configurations.
You can download TeamCity here:
https://www.jetbrains.com/teamcity/download/
Run the installer – I chose to run TeamCity and the agents under the ‘System’ account, and used the internal database (which they claim isn’t for production use, but…for a small indie studio is perfectly fine). If you want to go through the hassle of setting up Postgres etc, be my guest, but the internal DB is fine for most small use cases.
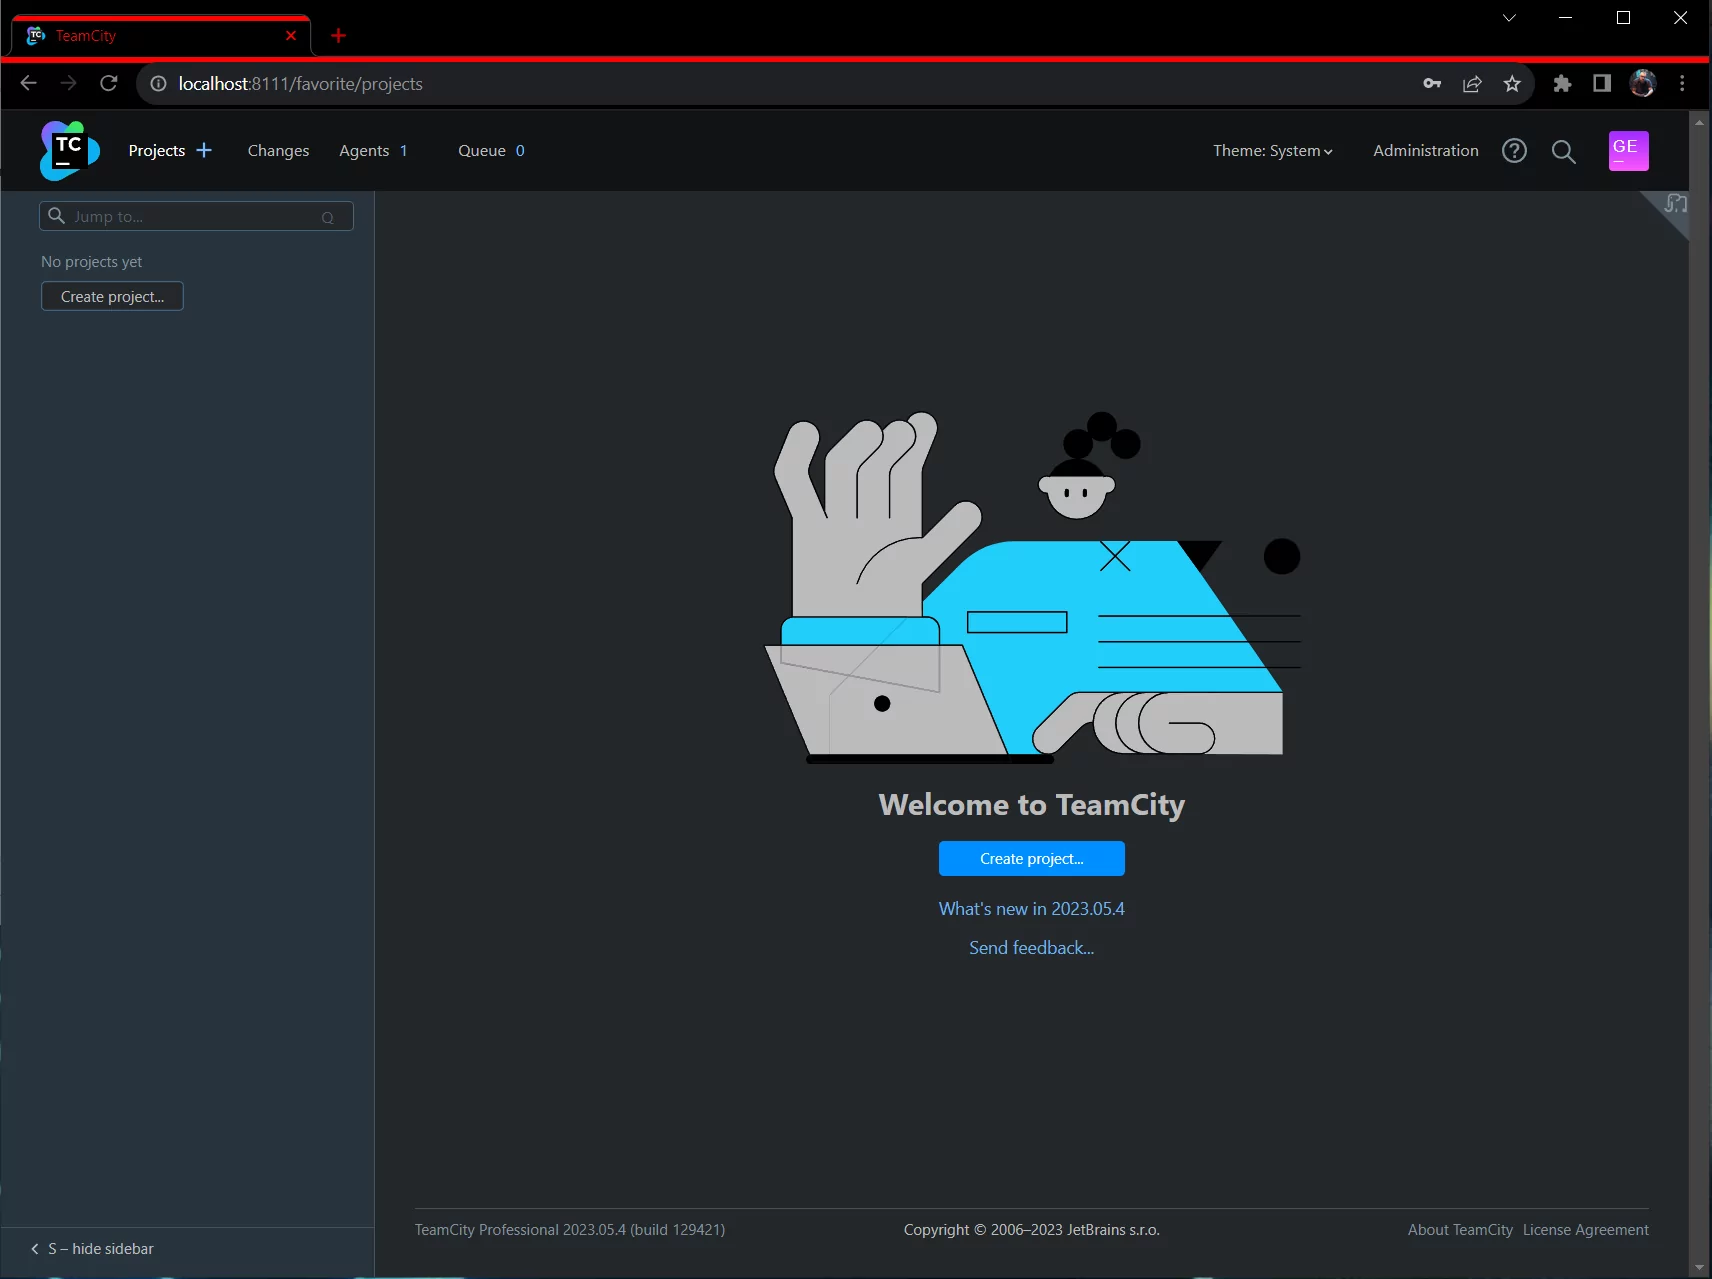
TeamCity is entirely web-based (just like Jenkins), so you’ll need to pick an open port – if you have a web server or anything similar running, pick a different port than 80, 8080 or whatever. I’m using 8111 for my TeamCity port.
Once TeamCity is installed you need to create an Admin account and it will take you to the main TeamCity home page.
Create a Project and first Build Configuration
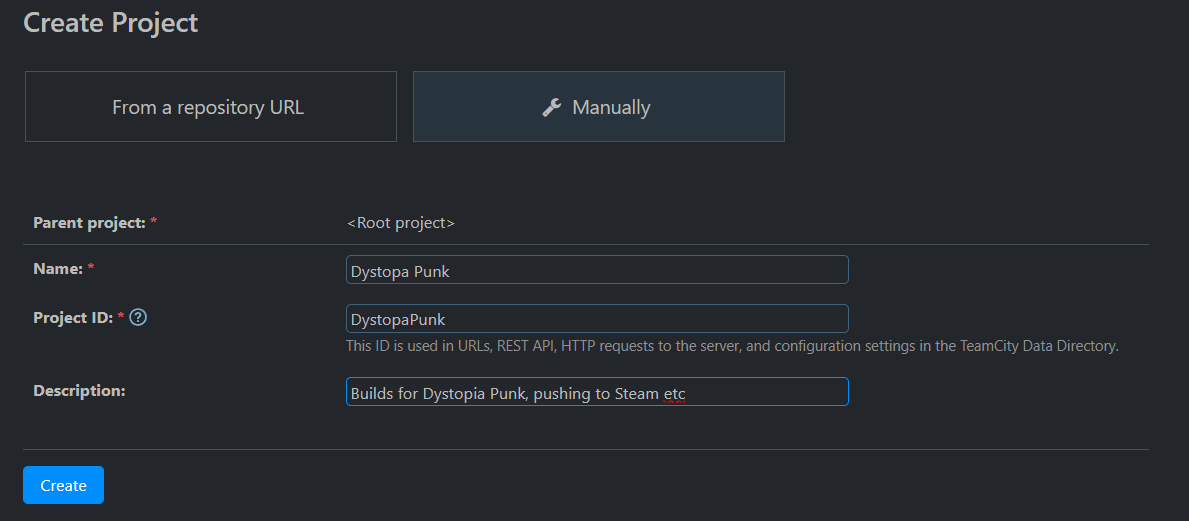
First thing we need to do is create a project and build configuration.
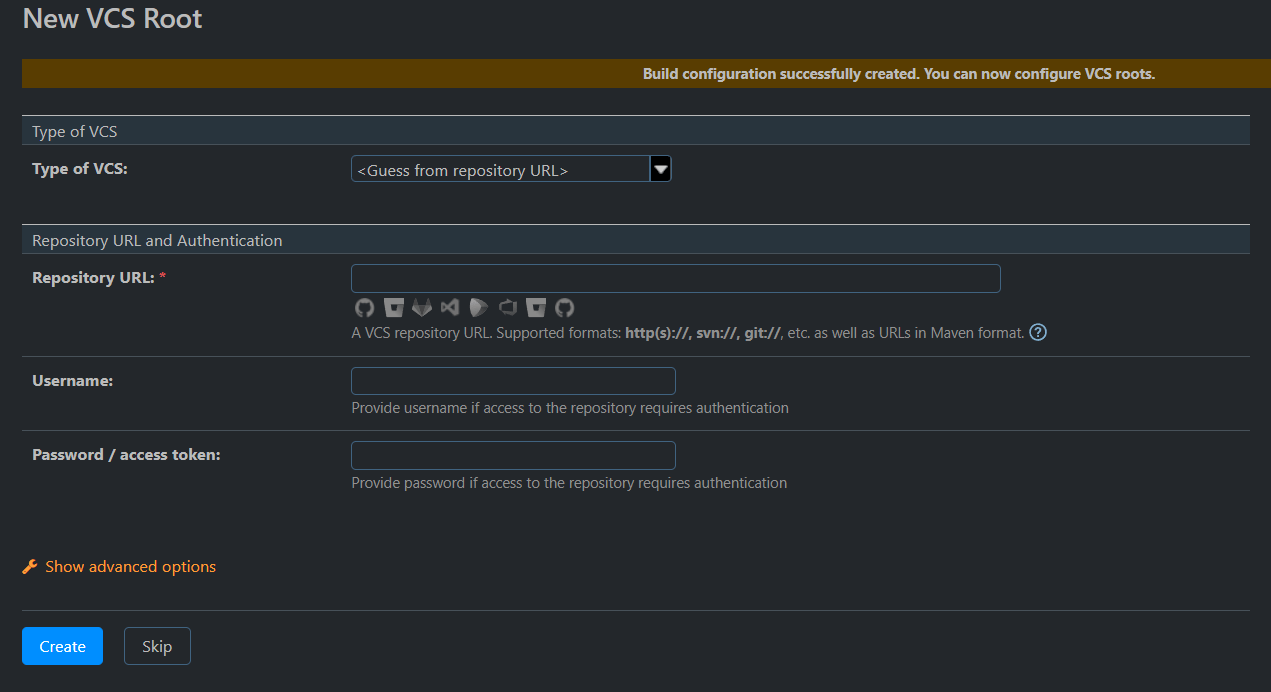
If you’re hosting you project in Github etc you might be able to use the ‘From Repository URL’ option when creating your project – TeamCity will attempt to figure out what type of project it is etc, but since I’m using Perforce, I’ll just use the ‘Manually’ option when creating my project, like so:
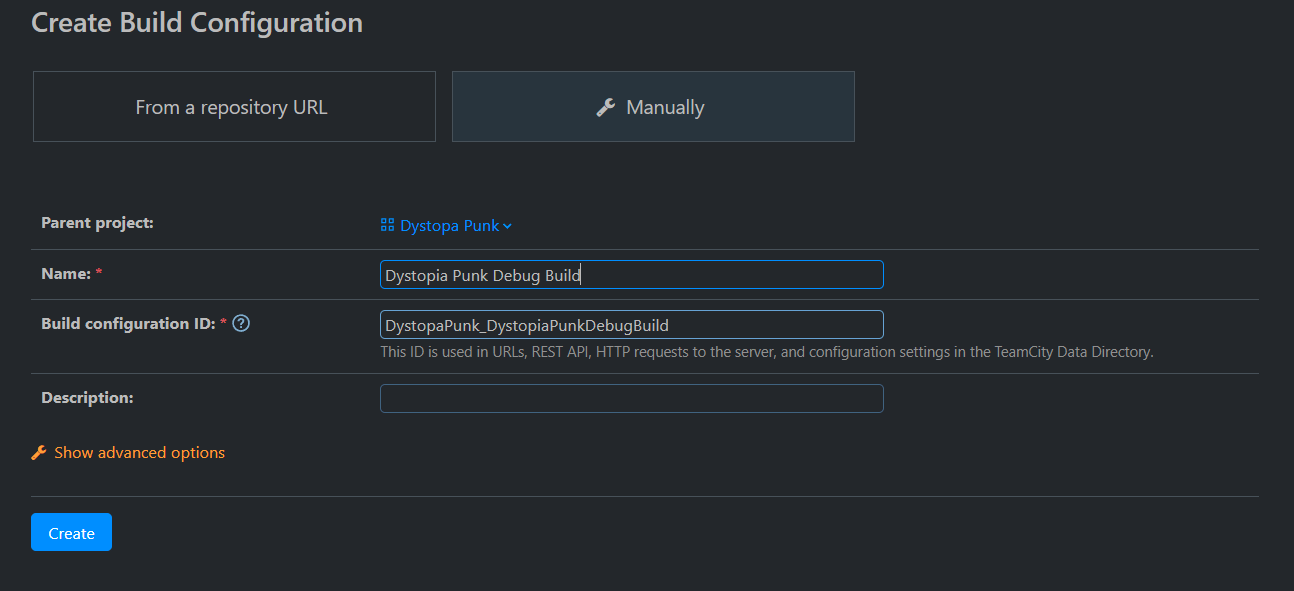
Next, TeamCity prompts you to create a build configuration

Lets’ do that by clicking ‘Create build Configuration’

Here again, TeamCity wants to try and auto figure the build config out from the Repo, but I’ll just use Manually again and call this one ‘Dystopia Punk Debug Build’
Configuring the VCS (Perforce) root
Next we need to configure the VCS root (version control system).
Under ‘Type of VCS’ if you hit the dropdown, one of the options is Perforce Helix Core, which is what I’m using, so if I choose that the form changes, providing a bunch of perforce-specific configuration options
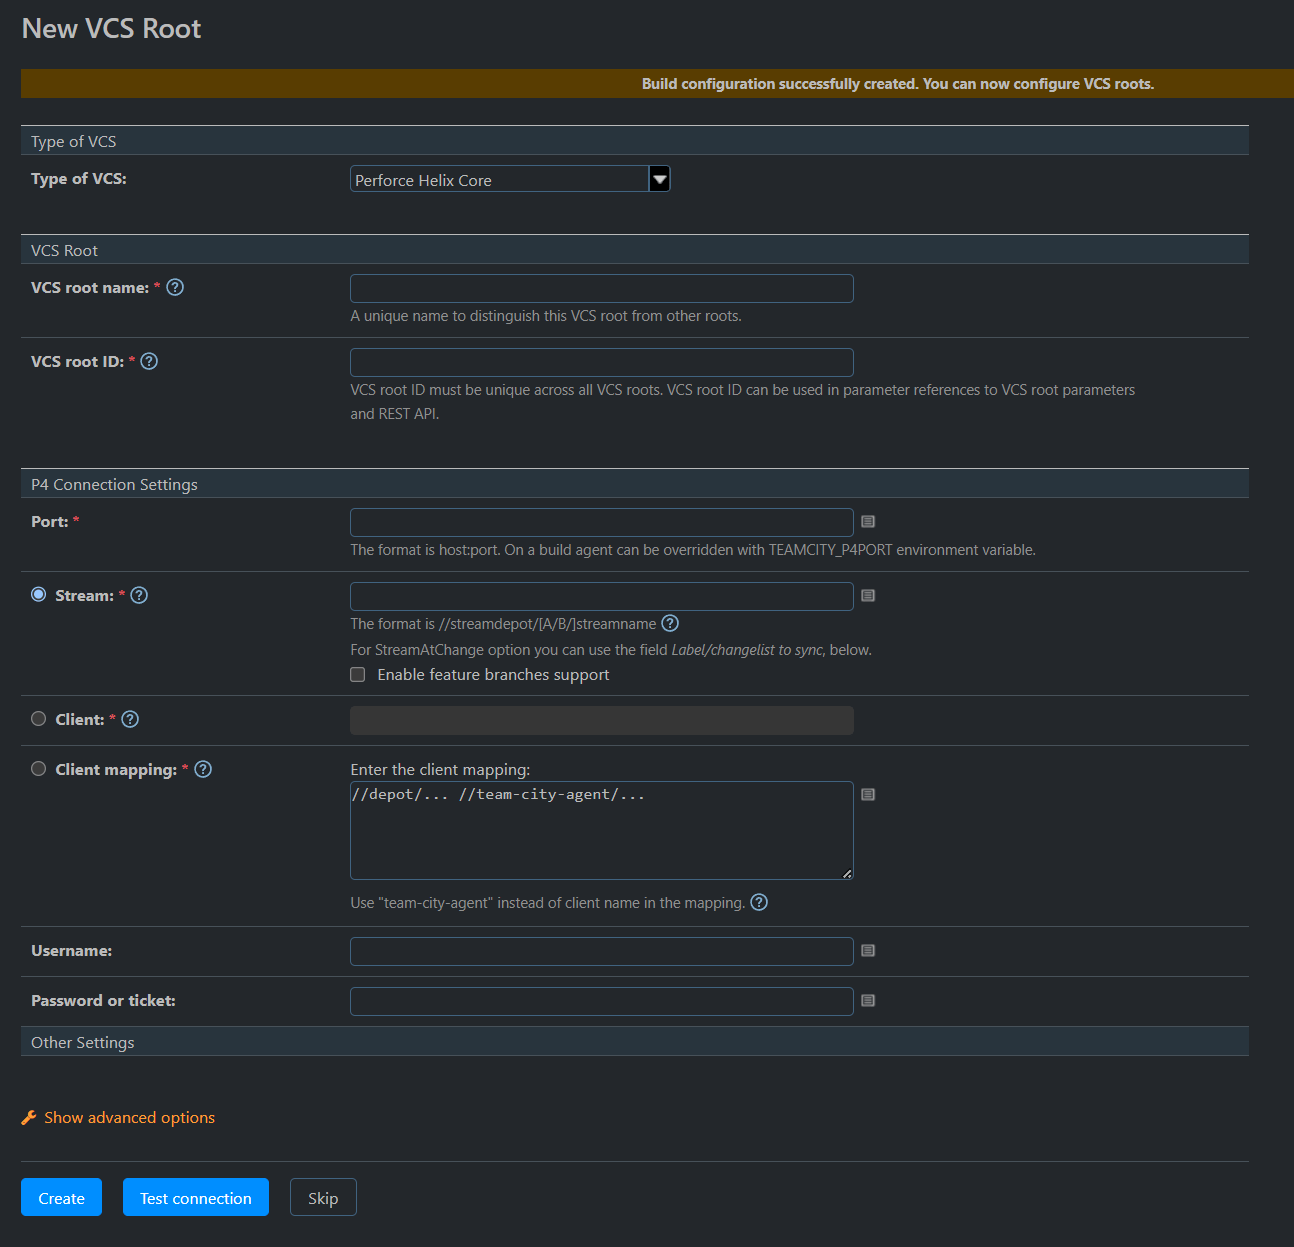
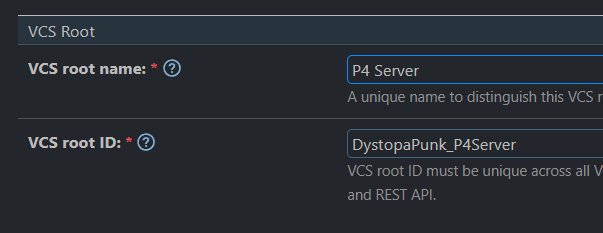
For VCS Root Name I’ll simply enter P4 Server and you can see the VCS Root ID automatically prepends the project name, like so:
The ‘P4 Connection Settings’ is the same info you entered into Perforce when you created your workspace – you can find out the Repo URL and username by going to Connection → Open Connection in the perforce client (P4V). I’d recommend creating a new / separate user for the build server if possible, however in my case this would cost me a whole other Perforce license, I’m just using my personal username for the builds.
At my day job I created a custom user for the build server so that it can be shared with others in the IT / admin group.
The final thing you need to specify is how you are going to connect to the depot. There are 3 options: Steam, Client or Client Mapping.
Since I have content in my perforce depot that doesn’t need to be sync’d to the Build Agent (source art etc), I’m going to setup a custom Client Mapping and use that option.
As you can see you need to use //team-city-agent/… instead of the usual ‘workspace name’ when you are creating your mapping, but otherwise this should look familiar to perforce users.
You can find out your current workspace mapping by going to Connection → Edit Current Workspace and clicking the text option, like so:

As you can see my normal mapping simply maps the entire depot to my workspace, but I want to be more selective on the build server, like so:

What this says is that I’m going to grab everything in my depot under project/DystopiaPunk.Client and map it into a local workspace for the team-city-agent in the same relative path. If there were other folders that I needed to map I could duplicate this line and update them accordingly.
Once you’ve configured your client mapping, entered your username & password you can click ‘Test Connection’ and if all goes according to plan you should see a ‘Connection successful!’ message like so:

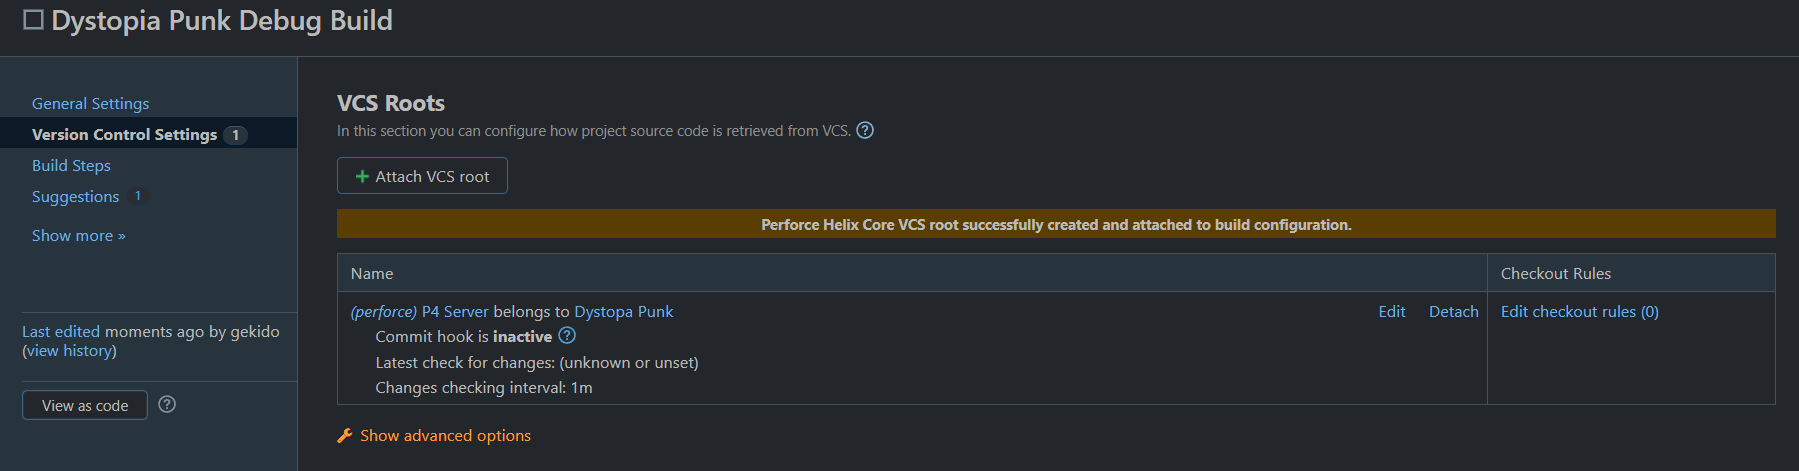
Click ‘Create’ to finish creating the VCS Root. This will take you back to the main Build configuration screen like so:
This ended up being much longer than I expected, so I’m going to stop there for this post. Next time we’ll continue setting up our build pipeline, Building the Unity project, running the Steampipe build to upload the game to Steam and finally configuring Slack notifications to let people know that builds are working or failing!
Until next time!
